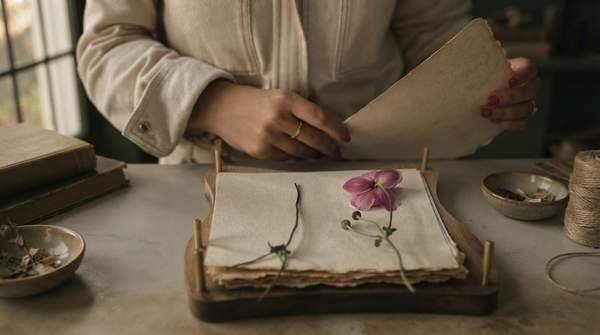
Pressed flowers become elegant, lasting home decor when you follow three linked steps: choose naturally flat, freshly picked blooms, press them slowly between absorbent paper under steady weight, and then mount and protect the finished piece from light and humidity. Two air-drying methods dominate the craft—the humble book press and the more controlled wooden press—and the right choice depends on your flowers, your equipment, and how polished you want the result.
Introduction to Botanical Pressing for Home Decor
Flower pressing is one of the simplest ways to turn a garden cutting or a meaningful bouquet into something you can hang on a wall. The Royal Horticultural Society, which teaches the technique in its school gardening resources, frames it as a purposeful craft: deciding in advance what you want to make—a display, a bookmark, a seasonal scrapbook—helps you choose which botanicals to collect in the first place.
That planning-first mindset is what separates a drawer full of crumbled petals from a framed piece you're proud to display. This guide walks through the whole workflow: selecting and preparing your botanicals, choosing between the book and wooden press methods, pressing step by step, and finally mounting and preserving your artwork so it holds its color for years.
Selecting and Preparing Your Botanicals
The best flowers to press are naturally flat or soft-petaled. Floral experts at Viola Floral recommend violets, pansies, daisies, cosmos, baby's breath, and ferns—blooms that dry well and hold their color beautifully. Timing matters too: pick flowers in their prime, before they begin to wilt, and gather them on a dry day, ideally in the morning after the dew has evaporated. Damp, moisture-heavy flowers tend to brown during pressing.
Thicker blooms like roses, dahlias, and ranunculus can also be pressed, but they need extra preparation. Trim away thick stems and excess petals to reduce bulk before laying them down. Preparing the flower is half the work; the other half is choosing a pressing method that suits what you've collected.
Choosing Your Flower Pressing Method
Both methods work by the same principle—absorbent paper wicks moisture out while steady pressure flattens the bloom—but they differ in equipment, control, and capacity. The table below compares them across the criteria that should drive your decision.
| Method | Equipment Needed | Best For (Flower Types) | Typical Drying Time |
|---|---|---|---|
| Book pressing | Parchment paper (kitchen or tissue paper also work), heavy hardback books, plus additional heavy objects for weight | Naturally flat or delicate flowers: violets, pansies, daisies, cosmos, baby's breath, ferns | Varies with weight applied and paper used; check and replace damp paper as needed |
| Wooden press | Two smooth pieces of wood (plywood or hardboard, roughly 280×350mm and 5–10mm thick), corrugated cardboard sheets, newspaper, blotting paper, bolts and wing nuts—often bundled in a press kit | A wide range of flowers, including flat and delicate blooms; adaptable to thicker flowers once bulk is trimmed away | 1 to 3 weeks, depending on flower thickness and home conditions |
The comparison points to a clear pattern: the book method is the accessible starting point using things you already own, while the wooden press offers more consistent pressure, reusable materials, and room for multiple layers at once. If you're pressing a single flat pansy, a book will do; if you're working through a bouquet or thicker blooms, the wooden press gives you better control.